From One to One Hundred?
It's the Summer holidays at the moment in Taiwan. We are not travelling back to Australia due to the fact that we now have a little one. I managed to sneak up to my roof top bonsai garden this afternoon and have a closer look at a tree I wanted to 'improve'. This particular tree was bought as a tiny cutting 2 and a half years ago.
Anyway, here is the tree before making some changes.
 |
| It has been in this training pot for 6 months after growing in the ground for 2 years. |
 |
| After digging it out of the ground in late Winter/early Spring all I wanted to do is have it survive. I tried to secure the tree in this pot with some wire to keep it as stable as possible. Oh, I also planted it in a free draining soil mix. I did keep some of the original soil from the ground it came out of as well. |
 |
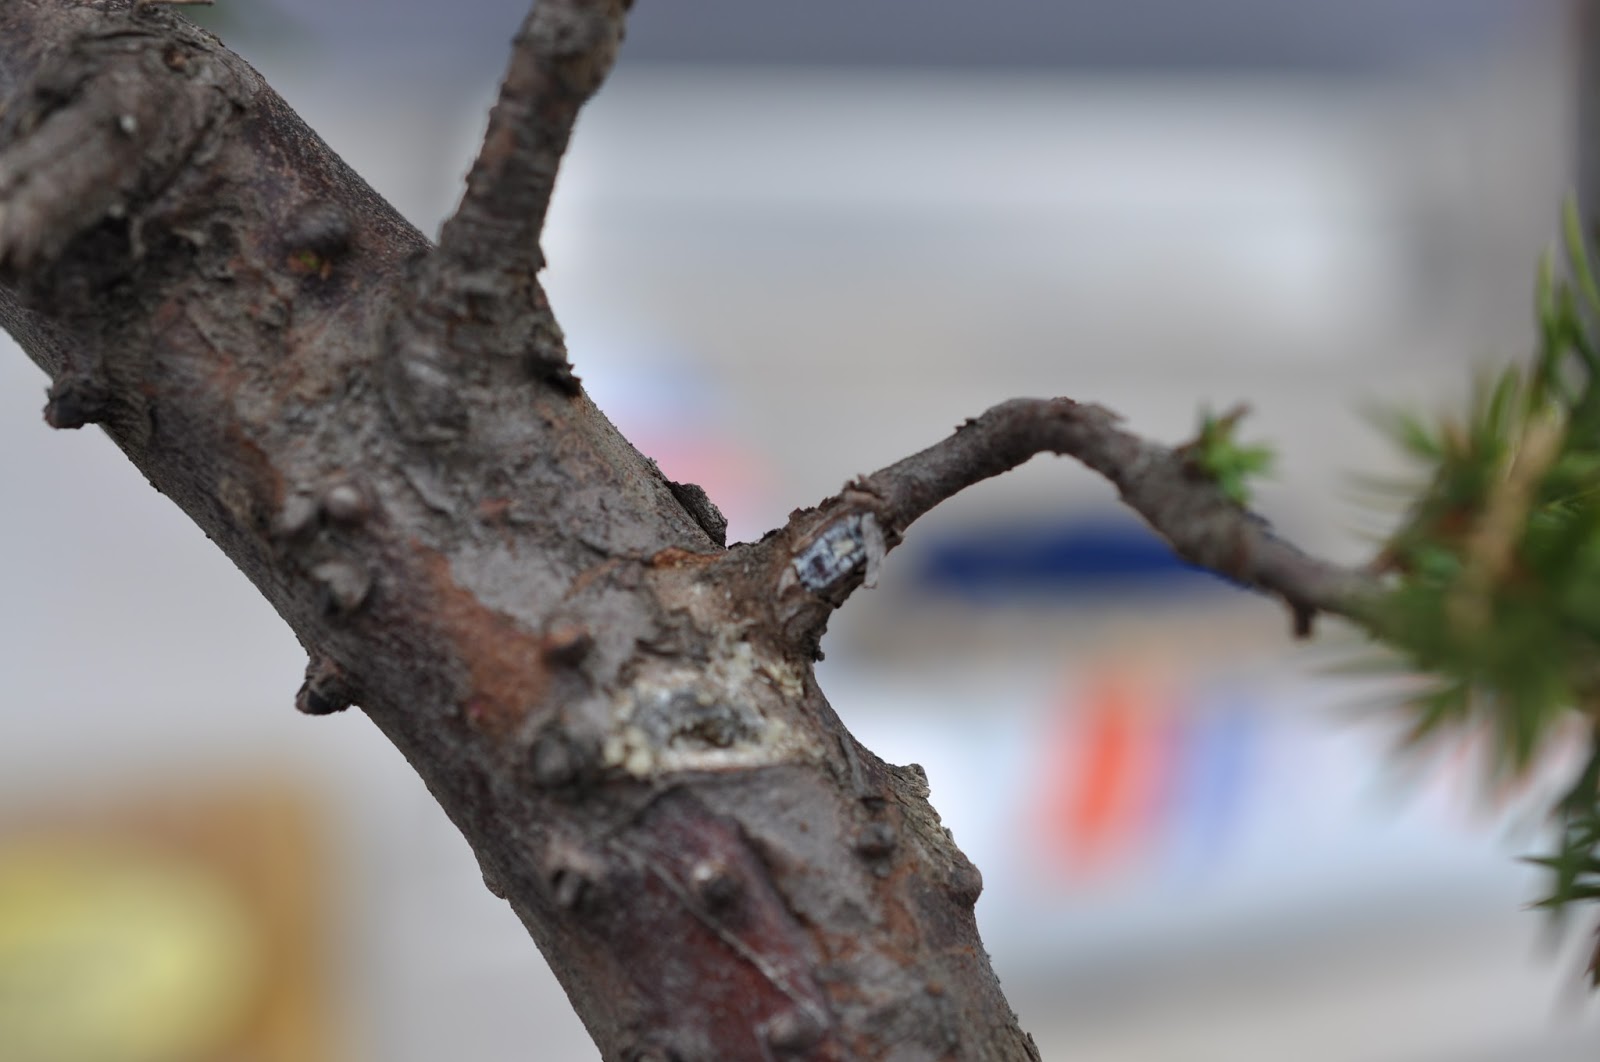
| Now, we see here some of the bark peeling. It is a good idea to peel off this bark on junipers. The reason being that insects love making their home under here and it could cause a problem later. The main feature of a juniper is dead wood - it is always something you should consider when working with your junipers - try and create some dead wood areas! The other thing you can do with junipers is lightly sand paper the bark to bring out the almost purple colour. I didn't do this but I probably should have! |
 |
| I continue peeling the bark away with some tweezers all the way up the trunk. You can see under the bark that reddish/purplish colour. That colour in contrast to the white of the dead wood is the effect that junipers are known for. |
 |
| The next step is to remove all the growth you find in the branch junctures. This juncture growth makes the tree look young and it sucks up energy that you want directed into more desirable areas of the tree. |
 |
| You can see here some growth removed. The other reason we do this is that it makes wiring the branch easier. |
 |
Ok, decision time. Try your best to find the front of the tree - the angle that looks the best. Normally it is the side that doesn't have the trunk poking out to your face at the base and the rest of the trunk is slight leaning its way forward. This creates a feeling that the tree is larger - looming over you. The Taiwanese say it is like the tree bowing to the viewer. It just feels like the tree is ready to offer some shade to anyone that wants to sit in front of it! A bonsai tree should evoke a feeling of calm.
The other important step is to play around with tilting the tree this way and that. I felt my tree was leaning too far to the left so I wanted to raise it up. Once I was reasonably content with this 'new' angle I placed some stuff underneath the pot and began wiring.
|
 |
| I ended up this this design. These trees cost me about 30 Australian cents to buy as a cutting two and a half years ago. I planted 70 of them into the ground. I decided to just practice as many times as possible on these trees and hopefully learn something along the way. This has been tree number 2. I also have to say that looking at trees in bonsai books along with what you see on your hikes helps formulate a plan in your mind. |
 |
| I really wanted a back branch in here somewhere. A back branch will give the tree depth. I choose 3 branches to work with in the end. If I did this again I think I would look harder for a branch that was going to help with more depth. |
 |
| I considered using the top branch as the back branch but I think it looks better with it where it is. |
 |
| As I repotted the tree I added a mound of soil higher on the left side of the pot to help straighten the tree's angle. I also added spaghnum moss to assist with humidity. |
 |
I did use lime sulphur on the dead wood. Lime sulphur hardens up the dead area and protects it from insects and rotting. I used a tooth brush to apply the sulphur.
I could have taken the shari (peeled the bark) all the way to the base but I have always liked only part of the tree looking like lightning burnt half the tree.
On a side note I did all of this in the middle of Summer here in Taiwan. It probably isn't the best time to do this operation but I wanted to know for sure what I can get away with. I will however mist the foliage twice a day and I didn't cut any roots when I wired it in this nicer pot. If it were Spring time I would have cut some roots along the way. We will see how things work out.
Does this tree look like it has aged from one year to one hundred years? Probably not but hopefully it has given this tree some more personality and character. It now has an interesting story to tell.
Hopefully, it doesn't start with...Well, this dickhead from Australia thought.....
|


"Well, this dickhead from Australia thought....." hahahaha! I'm absolutely sure that wouldn't be the reaction!
ReplyDeleteI do think it looked better before you started.........just joking! I'm very impressed with the end result and appreciate the step by step description of your process. It is quite amazing the time and effort that goes into these transformations and how each tweak then leads to another.
The end product is unusual and stylish...it's a bold choice to go this way, but in my humble opinion, it works extremely well.
I agree with you that it looks better to have only a portion of the tree denuded of bark. Show another picture as it develops, please!