Stop the Rot - REPOT
If you are new to bonsai and are wondering how those trees stay miniature compared to their brothers and sisters that grow in the field, the simple answer is REPOT. Well, there are some other reasons but this is the main one.
Repotting the tree involves trimming the roots of the tree. It sounds quite basic but beware. There is a correct way to cut the roots and there is also a best time to carry out this procedure.
Let's focus on the best time to repot your trees. Keeping your tree healthy should always be of the highest priority. Everyone wants to keep their tree strong and worries that they will do something that will cause the tree to live a short life and ultimately, die. I too have those same concerns. If we didn't we wouldn't have bought or grown the tree in the first place. Now, the ideal time to repot your bonsai trees is in the EARLY SPRING. The weather is beginning to change slightly from the bitter cold to more milder days. Seize this opportunity to root prune your trees.
Why EARLY SPRING?
Well, firstly it needs to be slightly warm for new roots to grow. If you cut the roots in the Winter, it is still too cold. The root growth slows down and they will find it hard transporting energy to the branches and leaves. Now if you repotted in the middle of Summer this causes another problem. Because it is too hot, the tree needs plenty of water to maintain growth and if you have just cut the roots, they will be in high demand, putting too much stress on the roots that you did leave. The end result is a dried out dead tree.
The first step is to remove the tree from its pot. When you prepare to repot a tree try not to water it the day before. By not watering the tree, it becomes a little easier to take out of the pot and also to remove the old soil.
Have a look at the bottom of the pot and cut the wire that has been holding the tree in place to begin with. Take the tree out carefully as you do not want to damage it in any way. Some trees just pop out nice and easily but other, larger ones behave differently. For those larger trees you must use a root pruning hook and scrape away at the inside of the pot. Eventually, the tree will come out.
If you do not repot your trees, what will happen is that the roots will continue to grow inside the pot and kind of suffocate the tree. There will be nowhere for the roots to grow and over time the tree will get weak and die off. It has also been known for the roots to grow strong enough to the point where they will break the pot! The trees appreciate you cutting their roots and adding fresh soil and as a result the growth of the tree will be nice and vigorous.
Tilt the tree carefully on its side and begin scraping the bottom of the soil away with a strong root pruning fork. As you scrape away the old soil the roots will begin to untangle. Once this happens, start cutting them and continue to scrape. I was surprised at how many roots you can cut and how close you can get to the base of the tree. The idea is to develop roots that grow out from the sides of the trunk as opposed to those that grow downwards.
The tree that we are root pruning is a Trident Maple. A Trident Maple is a deciduous tree. Because it is a deciduous tree we can remove more roots compared to an evergreen tree. These trees can handle a lot of roots being cut. When dealing with an evergreen or conifer tree we cut a few less roots. They are less forgiving. These trees are different so we must adapt and alter our method. If we cut the same amount of roots for conifers as we do for deciduous trees there is a greater chance of killing the tree.
This is the same tree from above before taking it out of its pot
Ultimately knowing the amount of roots you can safely remove in Spring is going to be a bit of trial and error. If the tree responds well, then of course you remember and repeat the next time you repot. If the tree seems weak and doesn't grow that well during the months after you repot, then you may have removed too many roots. It will be up to you to work this out. I hope some of these pictures will give you a bases to work from in your own backyard.
Let's get back to the large Trident Maple.
After we scrape away the soil, cut the roots that are growing down, and remove those that are growing across and on top of one another, it is time to add new soil. We keep the same pot as before - sometimes you may want to vary the pot.

We then put some netting over the drainage holes to prevent the soil from coming out. Next we have to prepare to secure the tree in the pot with wire. The tree must be stable in the pot for the roots to grow properly. If the tree is not stable, there is a chance of the roots not taking. If you have really large trees it may not be necessary to hold the tree in place with wire, the tree's weight will do that job by itself. I plan on writing some more posts dedicated to tying trees in pots at a later stage.
Because this pot is quite a big size we have to add a layer of pumice (a lava rock which is extremely light) to aide drainage. The larger pots will hold more water in the bottom for longer periods of time. This is not great for the tree as it might be too wet for the roots to grow, resulting in root rot. If you have a smaller tree the bottom layer of pumice is not necessary as the smaller tree in pot will already dry out quite quickly.
We then add soil. In this nursery in Japan the soil mix is - 80% acadama, 25 % river sand, and 5% charcoal. The charcoal acts as a natural filtration system cleaning away impurities in the water.
Deciduous trees like holding more water than conifers. Because we know this we add a greater percentage of acadama to deciduous trees. The acadama will absorb more water and the river sand will allow the water to pass more freely. If on the other hand we were adding soil for a conifer we would add a greater % of river sand - maybe 30% or 40%. Conifers like to be on the drier side. The lower % of acadama will not have the same absorption rate and therefore the soil mix will be drier.
Having said all that, it also depends on what development stage your tree is at. If you already have a refined tree and you do not want it growing too fast anymore, add more acadama. A TREE WILL ALWAYS GROW FASTER IN SOIL THAT IS A LITTLE DRIER COMPARED TO WETTER. So if we have a tree, a tree that is quite refined, add more acadama - this will be a wetter mix because the acadama will absorb a lot of water, and it turn keep the soil mix wetter.
Now say you want your tree to grow quicker because we are still developing it, add a drier soil mix - more sand and less acadama.
Acadama in Japan is cheap. Acadama outside Japan is expensive. If you can't afford acadama then all is not lost. However, what you must do is find something that has the ability to absorb water but isn't too compact.
As you place the tree in the pot it is important to slightly twist the tree from side to side so it is directly on top of the soil.

HOW OFTEN DO YOU REPOT?
It DEPENDS on the development stage of your trees. Firstly, repotting is stressful for your trees so it is important to fertilize well during Autumn in preparation for the transplant.
The year after you repot the tree will grow well but it will grow a lot stronger the following year. Normally it is the second year where the tree will flourish. If you have a tree that is refined and you do not want it to grow much bigger it is a good idea to repot your tree every year. That way, you can slow down some of its growth.
If you want your tree to grow quickly, plant it in dry soil and repot every two years. The larger trees that you have, consider repotting them every 3 years.
Conifer trees do not need to be repotted as often as deciduous trees as they generally grow slower.
Also if you have smaller bonsai you will probably have to repot them more often than the larger trees as their pot will be filled with roots at a quicker pace. An easy thing to do is lift the pot and see if the roots are growing out of the drainage holes. If they are, then it is best to root prune. The other thing you can do is feel the soil. If it is rock hard then repot. If the soil is rock hard this means that water penetration to the roots will be difficult resulting in an unhealthy and weak tree.
One final point. After repotting do not fertilize your tree until after about 4 weeks. The reason being that the fertilizer can burn the root tips and kill them. As you reintroduce fertilizer, do it gradually.
Definitely the final point...root prune conifers a little before deciduous trees. Conifers can be root pruned in late Winter - they are nice and tough and have green foliage to keep them alive until the new roots grow.
Hope this information helps you out there.
Why EARLY SPRING?
Well, firstly it needs to be slightly warm for new roots to grow. If you cut the roots in the Winter, it is still too cold. The root growth slows down and they will find it hard transporting energy to the branches and leaves. Now if you repotted in the middle of Summer this causes another problem. Because it is too hot, the tree needs plenty of water to maintain growth and if you have just cut the roots, they will be in high demand, putting too much stress on the roots that you did leave. The end result is a dried out dead tree.
 |
| This particular tree is a Trident Maple. It is a very old and quite a large tree that I helped repot in Japan this Spring. |
The first step is to remove the tree from its pot. When you prepare to repot a tree try not to water it the day before. By not watering the tree, it becomes a little easier to take out of the pot and also to remove the old soil.
Have a look at the bottom of the pot and cut the wire that has been holding the tree in place to begin with. Take the tree out carefully as you do not want to damage it in any way. Some trees just pop out nice and easily but other, larger ones behave differently. For those larger trees you must use a root pruning hook and scrape away at the inside of the pot. Eventually, the tree will come out.
 |
| A healthy looking tree. Quite a lot of new roots have grown over the past year. |
Tilt the tree carefully on its side and begin scraping the bottom of the soil away with a strong root pruning fork. As you scrape away the old soil the roots will begin to untangle. Once this happens, start cutting them and continue to scrape. I was surprised at how many roots you can cut and how close you can get to the base of the tree. The idea is to develop roots that grow out from the sides of the trunk as opposed to those that grow downwards.
 |
| Quite a flat base. Roots that grew down have been cut and the tap root has also been cut into forming a slight concave shape. This can assist the tree to sit up a touch higher in the pot. |
Place the tree on a table in the upright position and begin raking the soil and roots outwards, away from the base of the tree. By using this action you will not damage the roots as much.
It is important to
find the original roots that are thicker.
It is from here that the feeder roots will grow from – you want this to
happen so you have a fanned out shaped root system. There will be a lot of smaller roots growing
over the top of these. You don't want
this so you can cut them away if they are on top or if they are starting to
cross over other roots. Do this when the
roots are still fine as it will be easier now than later when they thicken up
in the wrong position. Sometimes roots
will grow over other roots in the pot and form bulges that look ugly. The roots should always be growing out from
the trunk and laterally down – this is the effect you want. It creates an aged and stable tree.
 |
This is an example from another deciduous tree I repotted to highlight finding the original roots and cutting away some others that were starting to grow over the top of these. Again this is a deciduous tree so we remove quite a lot of roots. The white feeder roots you see growing out to the side are essential. These are the roots that do the bulk of the feeding. The larger ones do not absorb as many nutrients and water compared to the smaller roots. |
 |
| Again the same tree after it has been placed on its side. I wanted to show you how much soil and roots you are able to remove safely. |
Let's get back to the large Trident Maple.
After we scrape away the soil, cut the roots that are growing down, and remove those that are growing across and on top of one another, it is time to add new soil. We keep the same pot as before - sometimes you may want to vary the pot.

We then put some netting over the drainage holes to prevent the soil from coming out. Next we have to prepare to secure the tree in the pot with wire. The tree must be stable in the pot for the roots to grow properly. If the tree is not stable, there is a chance of the roots not taking. If you have really large trees it may not be necessary to hold the tree in place with wire, the tree's weight will do that job by itself. I plan on writing some more posts dedicated to tying trees in pots at a later stage.
Because this pot is quite a big size we have to add a layer of pumice (a lava rock which is extremely light) to aide drainage. The larger pots will hold more water in the bottom for longer periods of time. This is not great for the tree as it might be too wet for the roots to grow, resulting in root rot. If you have a smaller tree the bottom layer of pumice is not necessary as the smaller tree in pot will already dry out quite quickly.
 |
| You can see the wire that will be used to tie the tree securely in the pot. |
Deciduous trees like holding more water than conifers. Because we know this we add a greater percentage of acadama to deciduous trees. The acadama will absorb more water and the river sand will allow the water to pass more freely. If on the other hand we were adding soil for a conifer we would add a greater % of river sand - maybe 30% or 40%. Conifers like to be on the drier side. The lower % of acadama will not have the same absorption rate and therefore the soil mix will be drier.
Having said all that, it also depends on what development stage your tree is at. If you already have a refined tree and you do not want it growing too fast anymore, add more acadama. A TREE WILL ALWAYS GROW FASTER IN SOIL THAT IS A LITTLE DRIER COMPARED TO WETTER. So if we have a tree, a tree that is quite refined, add more acadama - this will be a wetter mix because the acadama will absorb a lot of water, and it turn keep the soil mix wetter.
Now say you want your tree to grow quicker because we are still developing it, add a drier soil mix - more sand and less acadama.
Acadama in Japan is cheap. Acadama outside Japan is expensive. If you can't afford acadama then all is not lost. However, what you must do is find something that has the ability to absorb water but isn't too compact.
 |
| Beginning to add the acadama, river sand, and charcoal. |
 |
| As this tree is tilting slightly towards the left we place the tree off center on the right side. We do this for balance and aesthetics. |
 |
| The next step is to secure the tree by tying the wires together. Look for a large root as an anchor point where the two wires can twist up against - that way, the tree will be nice and stable. |
 |
| This is known as a 4 point tie. |
 |
| Using a chopstick we gently work the soil around so we don't have any air pockets. If we have air pockets, the water will not be able to reach this small area and could result in some roots not getting any water and dieing off. As you poke the chopstick around what you will see is the soil collapsing further into the pot. Add more soil as you go about doing this procedure. |

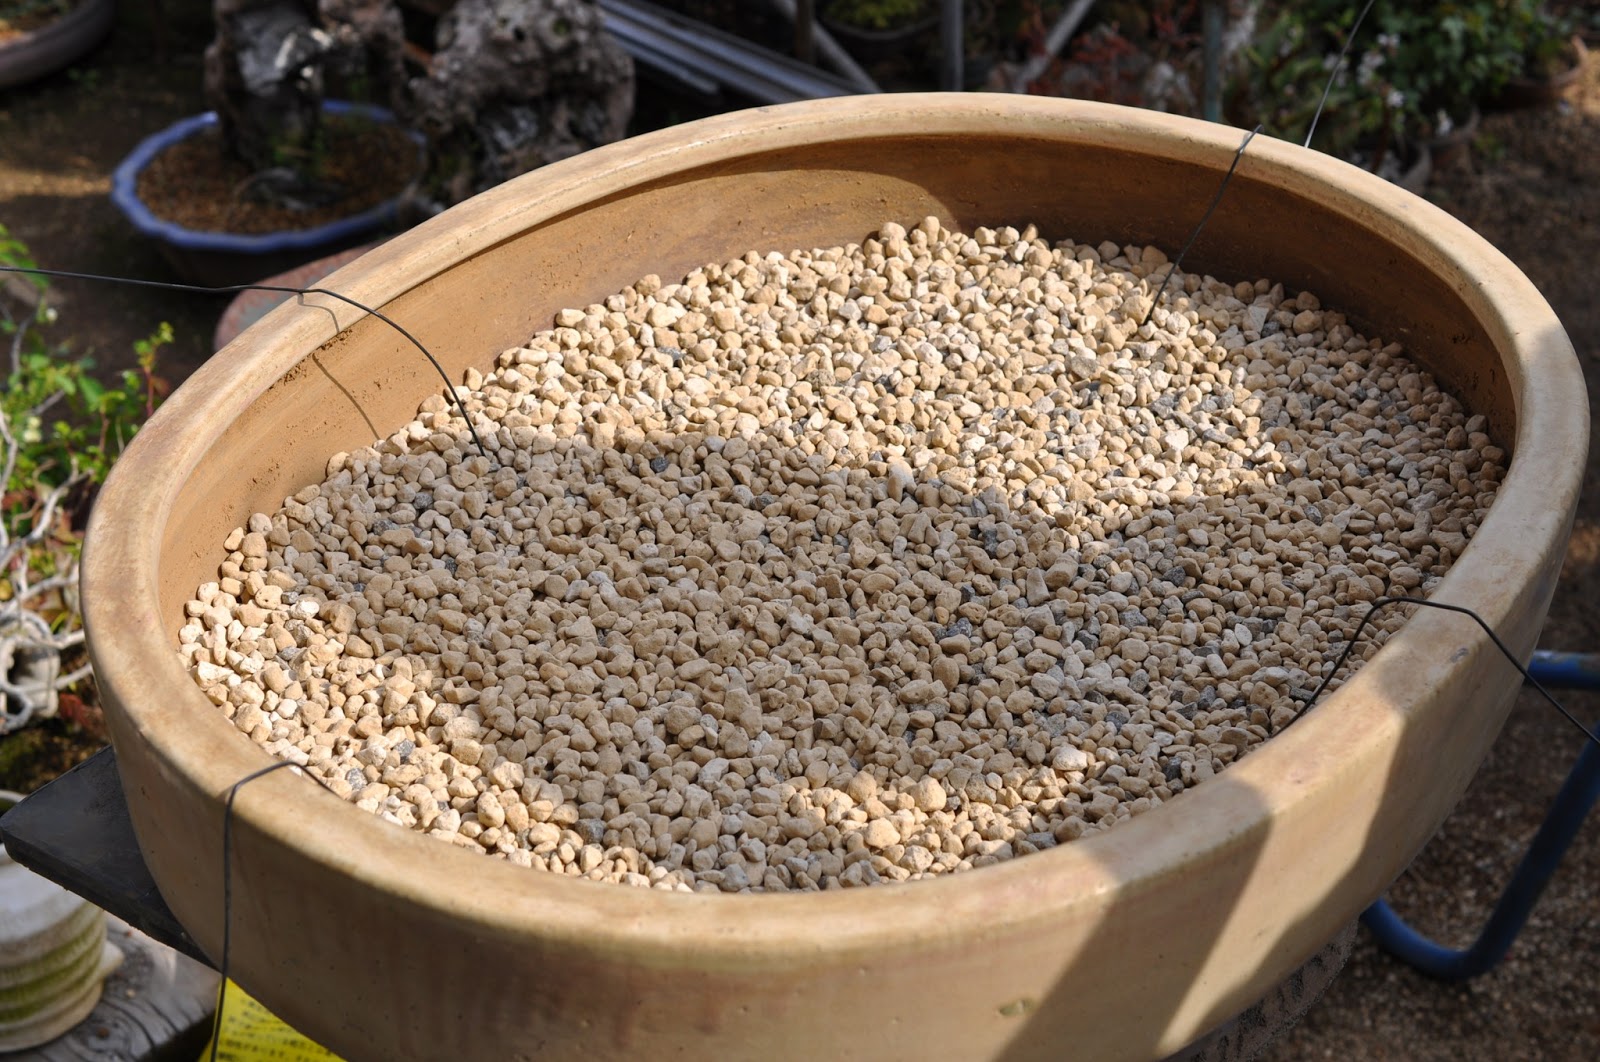
We finish off our repot by showering the tree with water. Give it a thorough water until the water draining through the holes is quite clear. It is important to completely soak all the soil in the pot. The roots like this and quickly become acclimatised to its new home.
HOW OFTEN DO YOU REPOT?
It DEPENDS on the development stage of your trees. Firstly, repotting is stressful for your trees so it is important to fertilize well during Autumn in preparation for the transplant.
The year after you repot the tree will grow well but it will grow a lot stronger the following year. Normally it is the second year where the tree will flourish. If you have a tree that is refined and you do not want it to grow much bigger it is a good idea to repot your tree every year. That way, you can slow down some of its growth.
If you want your tree to grow quickly, plant it in dry soil and repot every two years. The larger trees that you have, consider repotting them every 3 years.
Conifer trees do not need to be repotted as often as deciduous trees as they generally grow slower.
Also if you have smaller bonsai you will probably have to repot them more often than the larger trees as their pot will be filled with roots at a quicker pace. An easy thing to do is lift the pot and see if the roots are growing out of the drainage holes. If they are, then it is best to root prune. The other thing you can do is feel the soil. If it is rock hard then repot. If the soil is rock hard this means that water penetration to the roots will be difficult resulting in an unhealthy and weak tree.
One final point. After repotting do not fertilize your tree until after about 4 weeks. The reason being that the fertilizer can burn the root tips and kill them. As you reintroduce fertilizer, do it gradually.
Definitely the final point...root prune conifers a little before deciduous trees. Conifers can be root pruned in late Winter - they are nice and tough and have green foliage to keep them alive until the new roots grow.
Hope this information helps you out there.
Well done on a very comprehensive explanation! I suspect I'll still be able to kill most living things by either neglect or over-loving, but thanks for the tips!
ReplyDelete