Chinese Elm
My bonsai collection is slowing growing to where I now have over forty trees. Most of these trees are quite small and young, however, a few weeks ago I was given a 70 year old Chinese Elm tree by Annie's dad. Mr. Lin has been a bonsai man for many years but since he is too busy at his practice he has neglected his trees. I am happily taking them off his hands. I do feel some pressure though - this particular tree was dug out of the Taiwan mountains 40 years ago and has been resting on a rooftop apartment for the past 30 years. The last thing I want to do is damage it in any way or worse still, end its life.
 |
| Here is the old beast. |
 |
| In quite a deep pot. I want to repot it into a smaller pot so the tree looks more powerful. |
 |
| A close up. Nice moss growing on the bark. |
 |
| It is late winter at the moment here in Taiwan. Chinese New Year is in 3 weeks and it usually marks the beginning of spring. Chinese Elm's are really tough trees. My plan is to remove the dead wood, do some pruning, and wire the smaller branches. I will then let the tree sit for two weeks and repot. |
 |
| Cutting away some of the dead branches. |
 |
| I removed the larger left hand side branch. The entire branch was dead and had begun rotting. I decided to remove it because a rotting branch is an invitation for insects. We do not want these guys chewing up our trees. |
 |
| Cleaning up. That branch I cut was also dead. |
 |
| I will add cut paste to these wounds later. Cut paste aids the healing process because it prevents the wound drying out too much which may effect the branch that is living. |
 |
| Always thinking about the eventual shape of the tree. |
 |
| A closer look. |
 |
| Starting to wire the tree. |
 |
| I wire the thin branches. |
 |
| Trying to work out where the real front of the tree will be positioned. |
 |
| Plucking out some weeds and then misting the leaves. |
 |
| Maybe this is the front? The back branch will lean too far forward if it was the other way around. It would look too imposing. |
 |
| I let the tree rest for 2 weeks and now I decide to repot this tree. |
 |
| The tree comes out of its pot very easily! |
 |
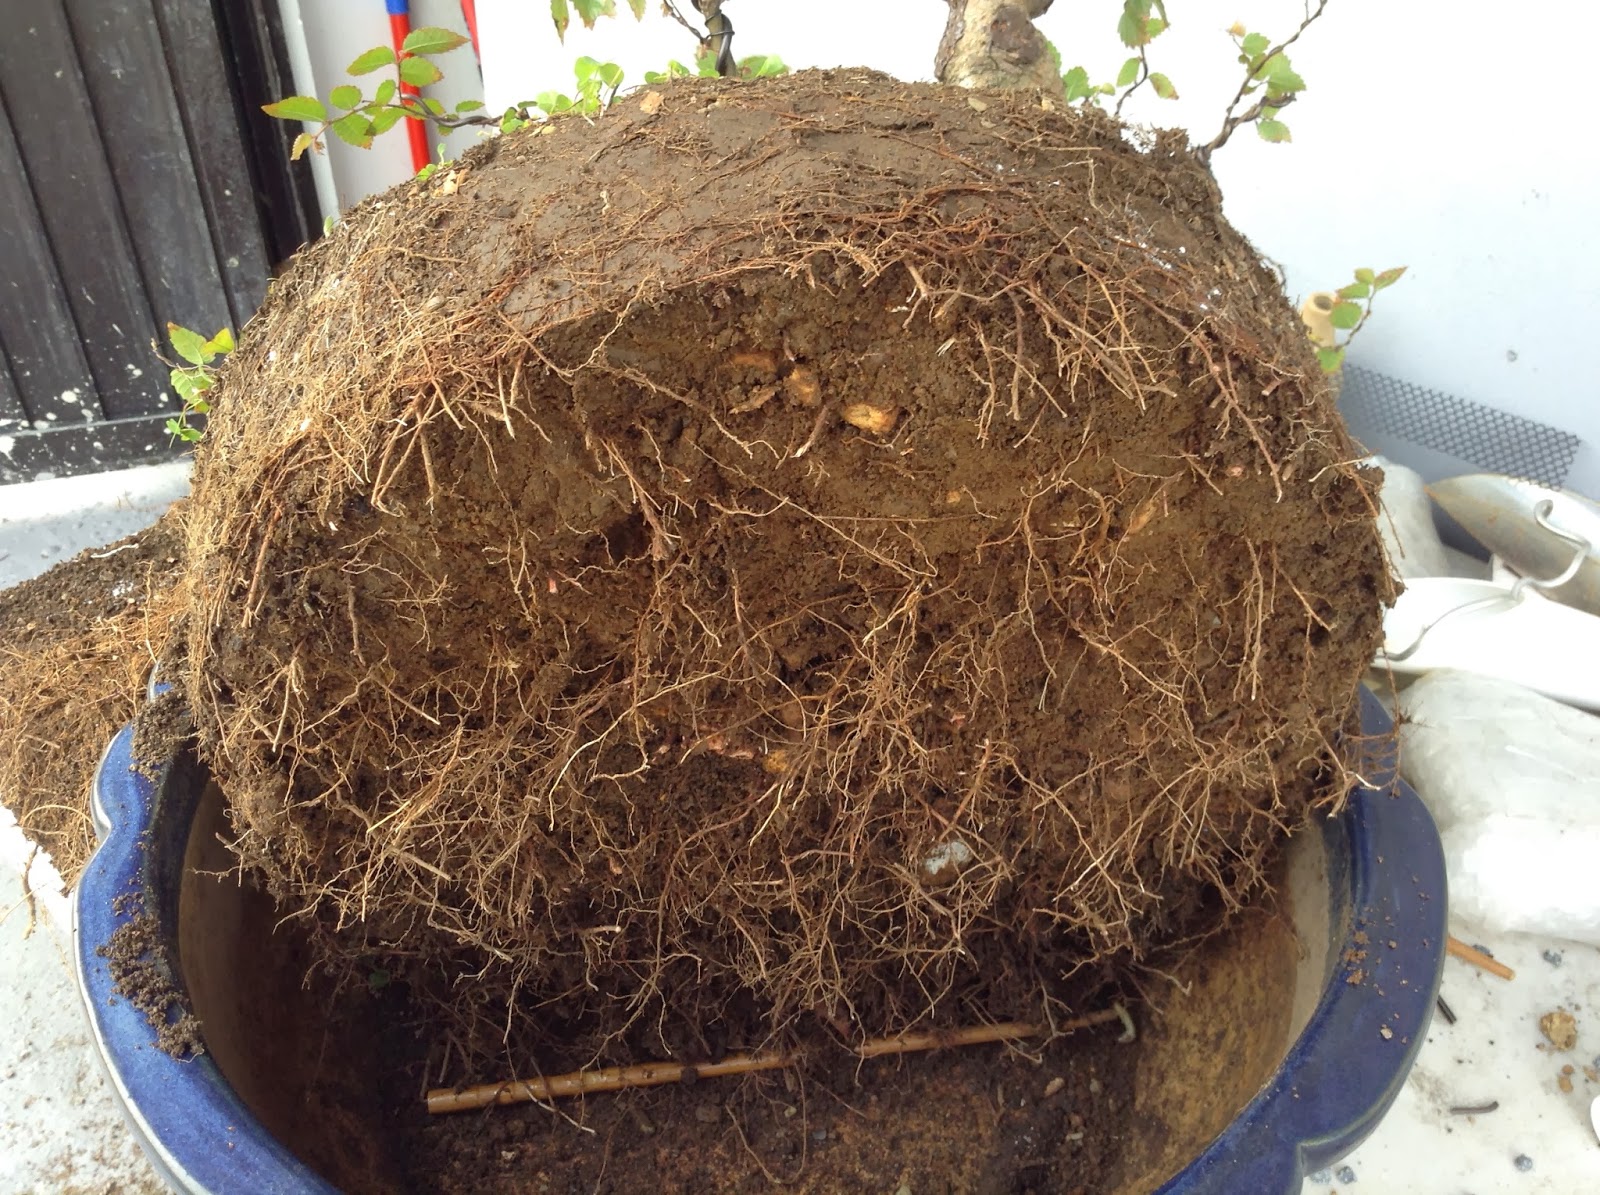
| I want to repot this tree into a smaller pot. The roots look healthy. I was expecting to see more roots actually. |
 |
| Cut these roots that are beginning to grow straight down. If you leave it too long this root will grow quite thick. The goal is to have the roots growing laterally away from the base. |
 |
| I will remove about 2/3 of these roots. |
 |
| Here we go. I am feeling some pressure because I know Mr. Lin (Johnson) will be eagerly quizzing me about this tree. It has been in his family for a very long time. |
 |
| It can be a messy business. |
 |
| Using root pruning forks is the way to go. I settle with chopsticks. |
 |
| Easy does it! |
 |
| The surface is interesting. I want to dig down and find the original roots. I cut off many that are either crossing or are growing too high up.. |
 |
| Keep digging down to reveal the thick roots underneath. This will make the tree look more stable, older, and stronger. |
 |
| I am misting these roots quite often. I do not want them to dry out. I have been working for about 45 minutes. |
 |
| Time to change the pot. Secure some drainage netting. |
 |
| This is the pot I choose. My little nursery now has over 100 pots. It is very satisfying to be able to choose something from my collection there and then. It all takes time to build up. |
 |
| I add a layer of small granite rocks for drainage. I also poke up one long piece of wire which I will use to tie the tree into the pot. |
 |
| I now add my soil. 100% acadama. I leave a small mound in the middle where I want the tree to rise up slightly. Again this will create the illusion of a powerful tree. |
 |
| I look for a large root to act as a brace for the joining of the ends of my wire. |
 |
| I twist the ends together with some pliers. |
 |
| I'm moving the pot around looking for the best front. |
 |
| The back branch is quite thick and moving away from the pot. Possibly I could remove it entirely. This may create a better taper? |
 |
| I decide on this front. |
 |
| I give it a healthy water. Make sure you see clear water drain out through the holes. |
 |
| After |
 |
| Before |
This looks great.....good luck with it. Looks like it was quite tough to tame the monster!
ReplyDeletealso....nice favicon!
ReplyDelete